My Necron need something big and after my Blog on the C’tan’s, I thought I would do something Special. I have always loved the K’daai Fireborn and this was my chance. I have never used Warhammer Forge bits so I was very excited. I hope to give you an idea as to how I do this.

Now I always deal with all forgeworld stuff the same way. After checking all the stuff is in the Box, I wash them out in warm soapy water. And then rinse off in cold water. I then cut off the excess and prep the models in the normal way.
After that I need the extra bits. To convert these Chaos Dwarf models into necrons I needed some 40k bits. I have loads of bits left over and my plan simple. The Head needed swapping out and the arms needed some weaponizing. This kit comes in a squad of 3. I wanted each to have a different look, so one would have 2 weapon arms, one would have a larger gun and the last would be all about the Claws.
I will focus on the 2 gun shard for now, but the other 2 are well on the way.
Parts List
1 K’daai Fire Born
2 Tesla Carbine
1 Old Metal Tomb Spider head
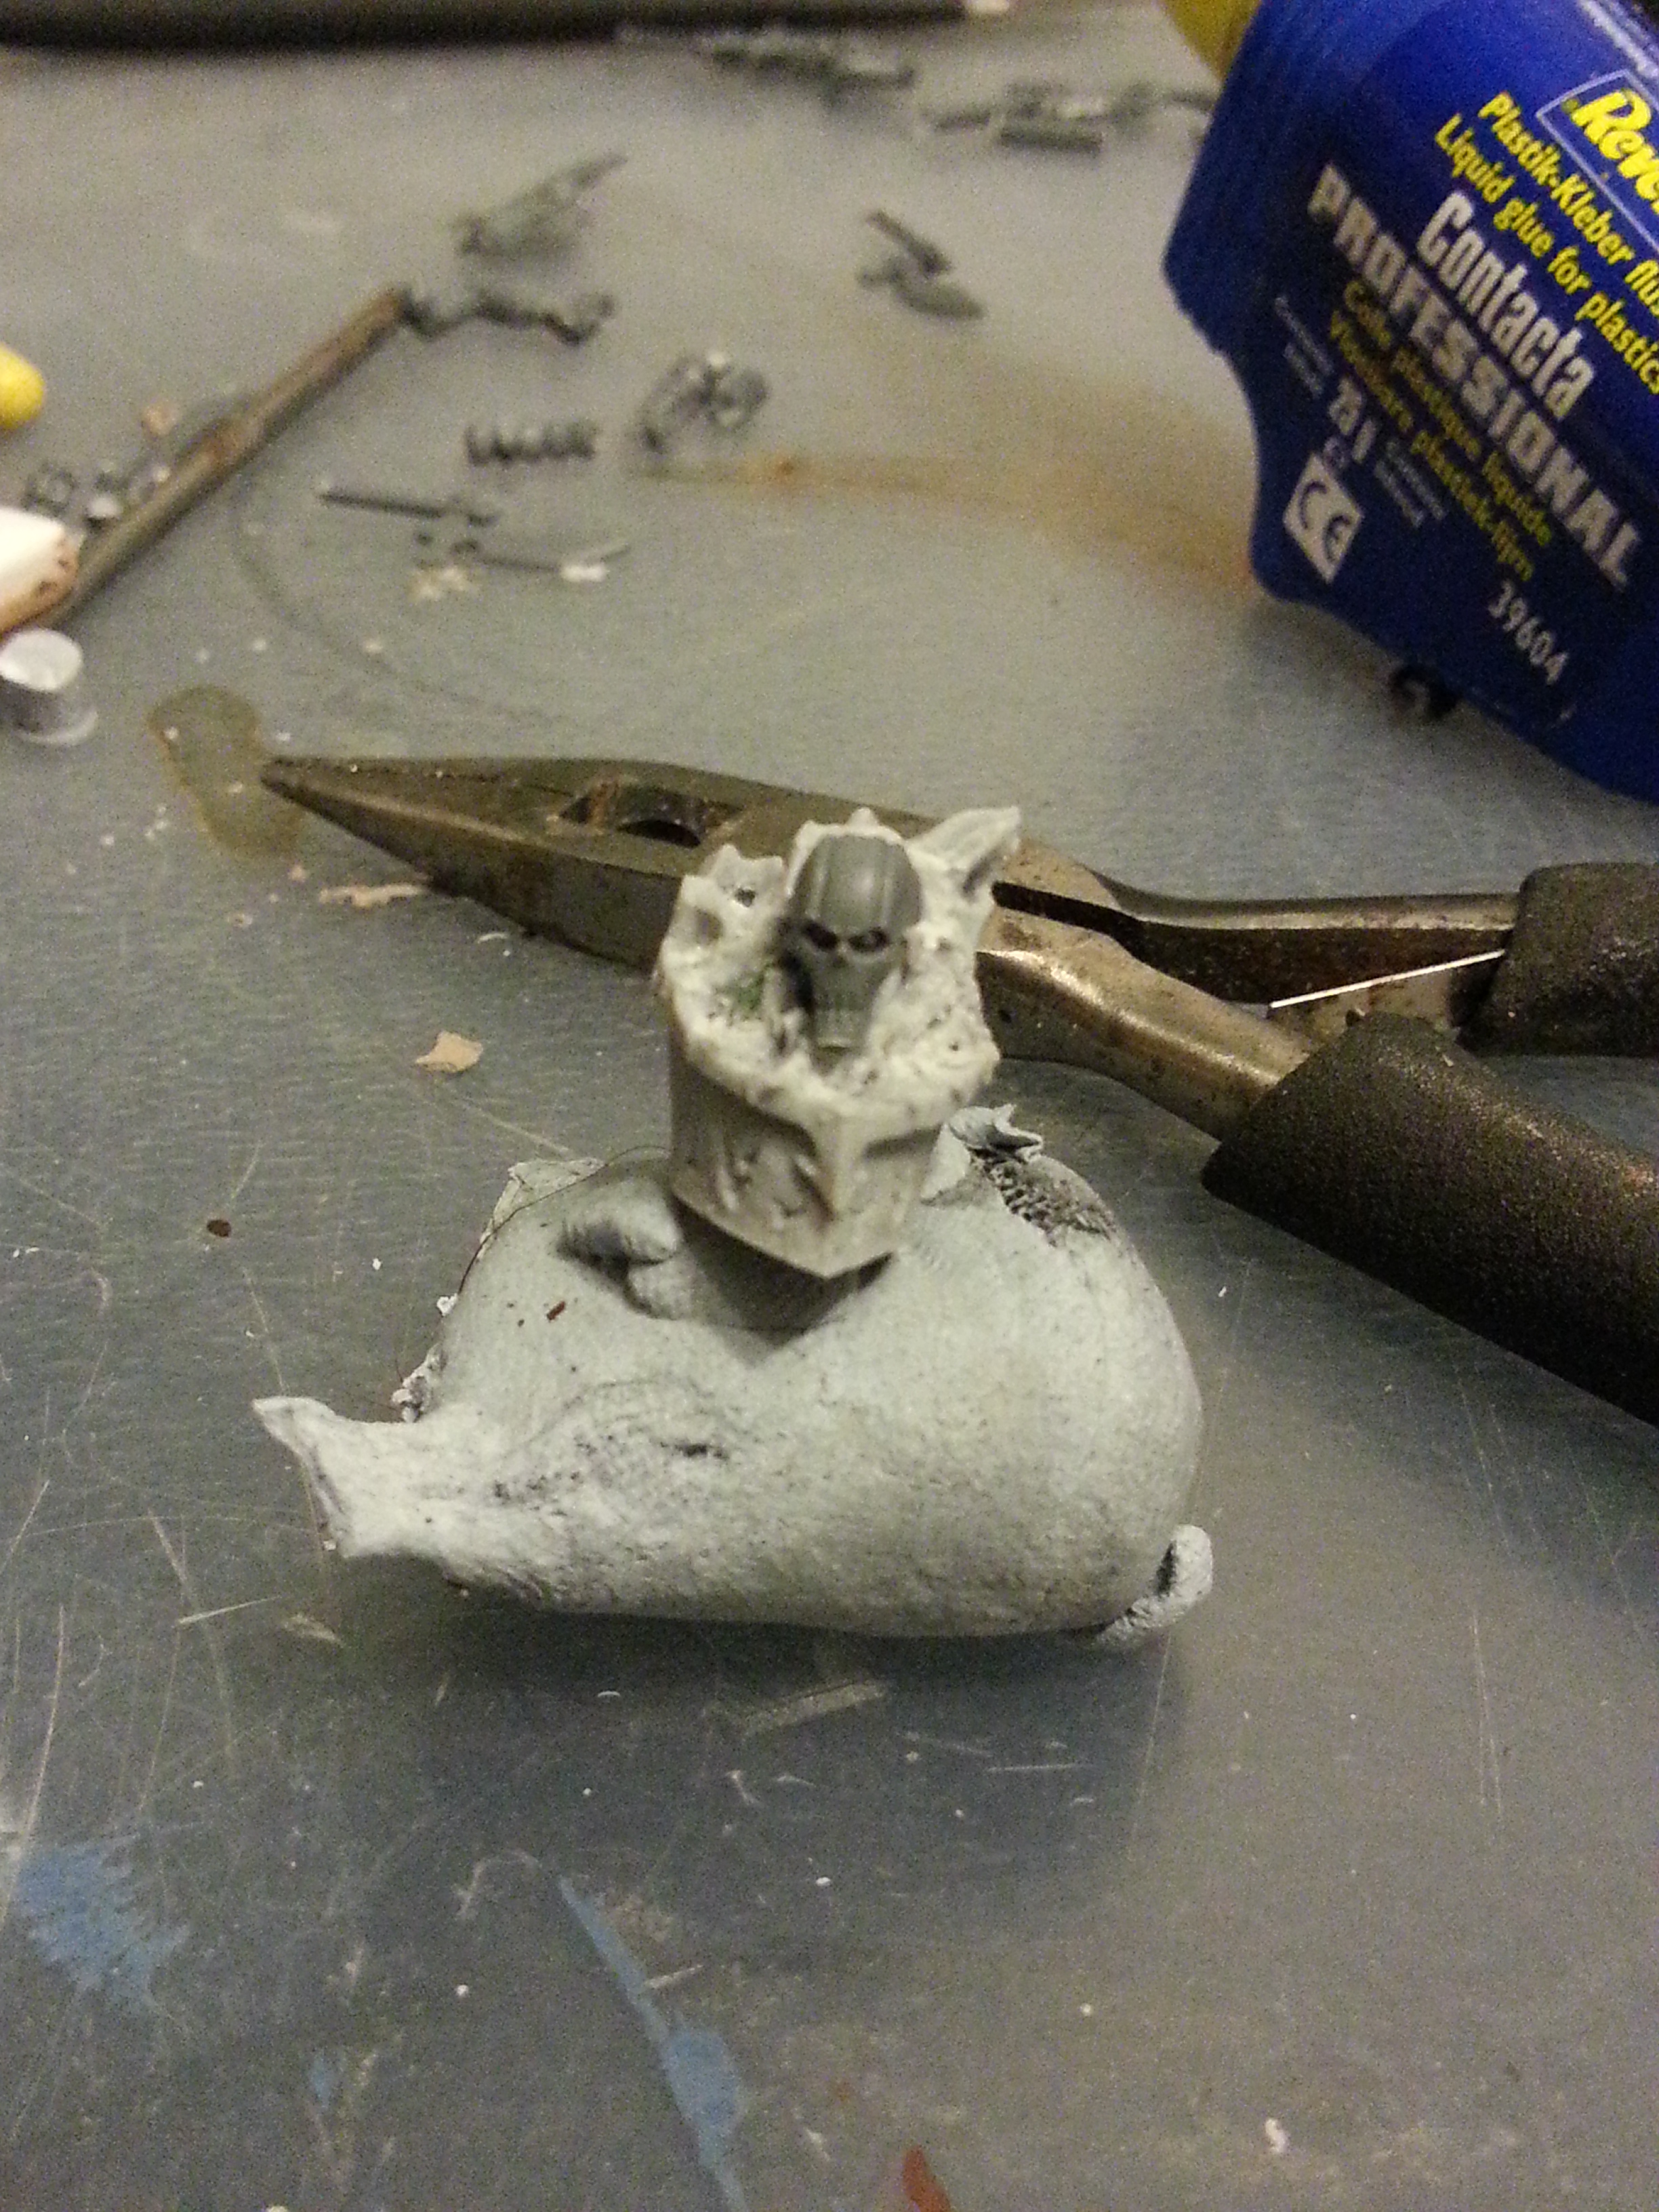
I started off with the head. I stripped of the Resign head. I trimmed it down with a knife and then I used my Multi tool to carve it out. I then had my chance to try out the Metal insect head. It really did not work, but Plan B was always to try it with a Necron Immortal Head. This looked ok, while a tad small it made him look more like a slave.
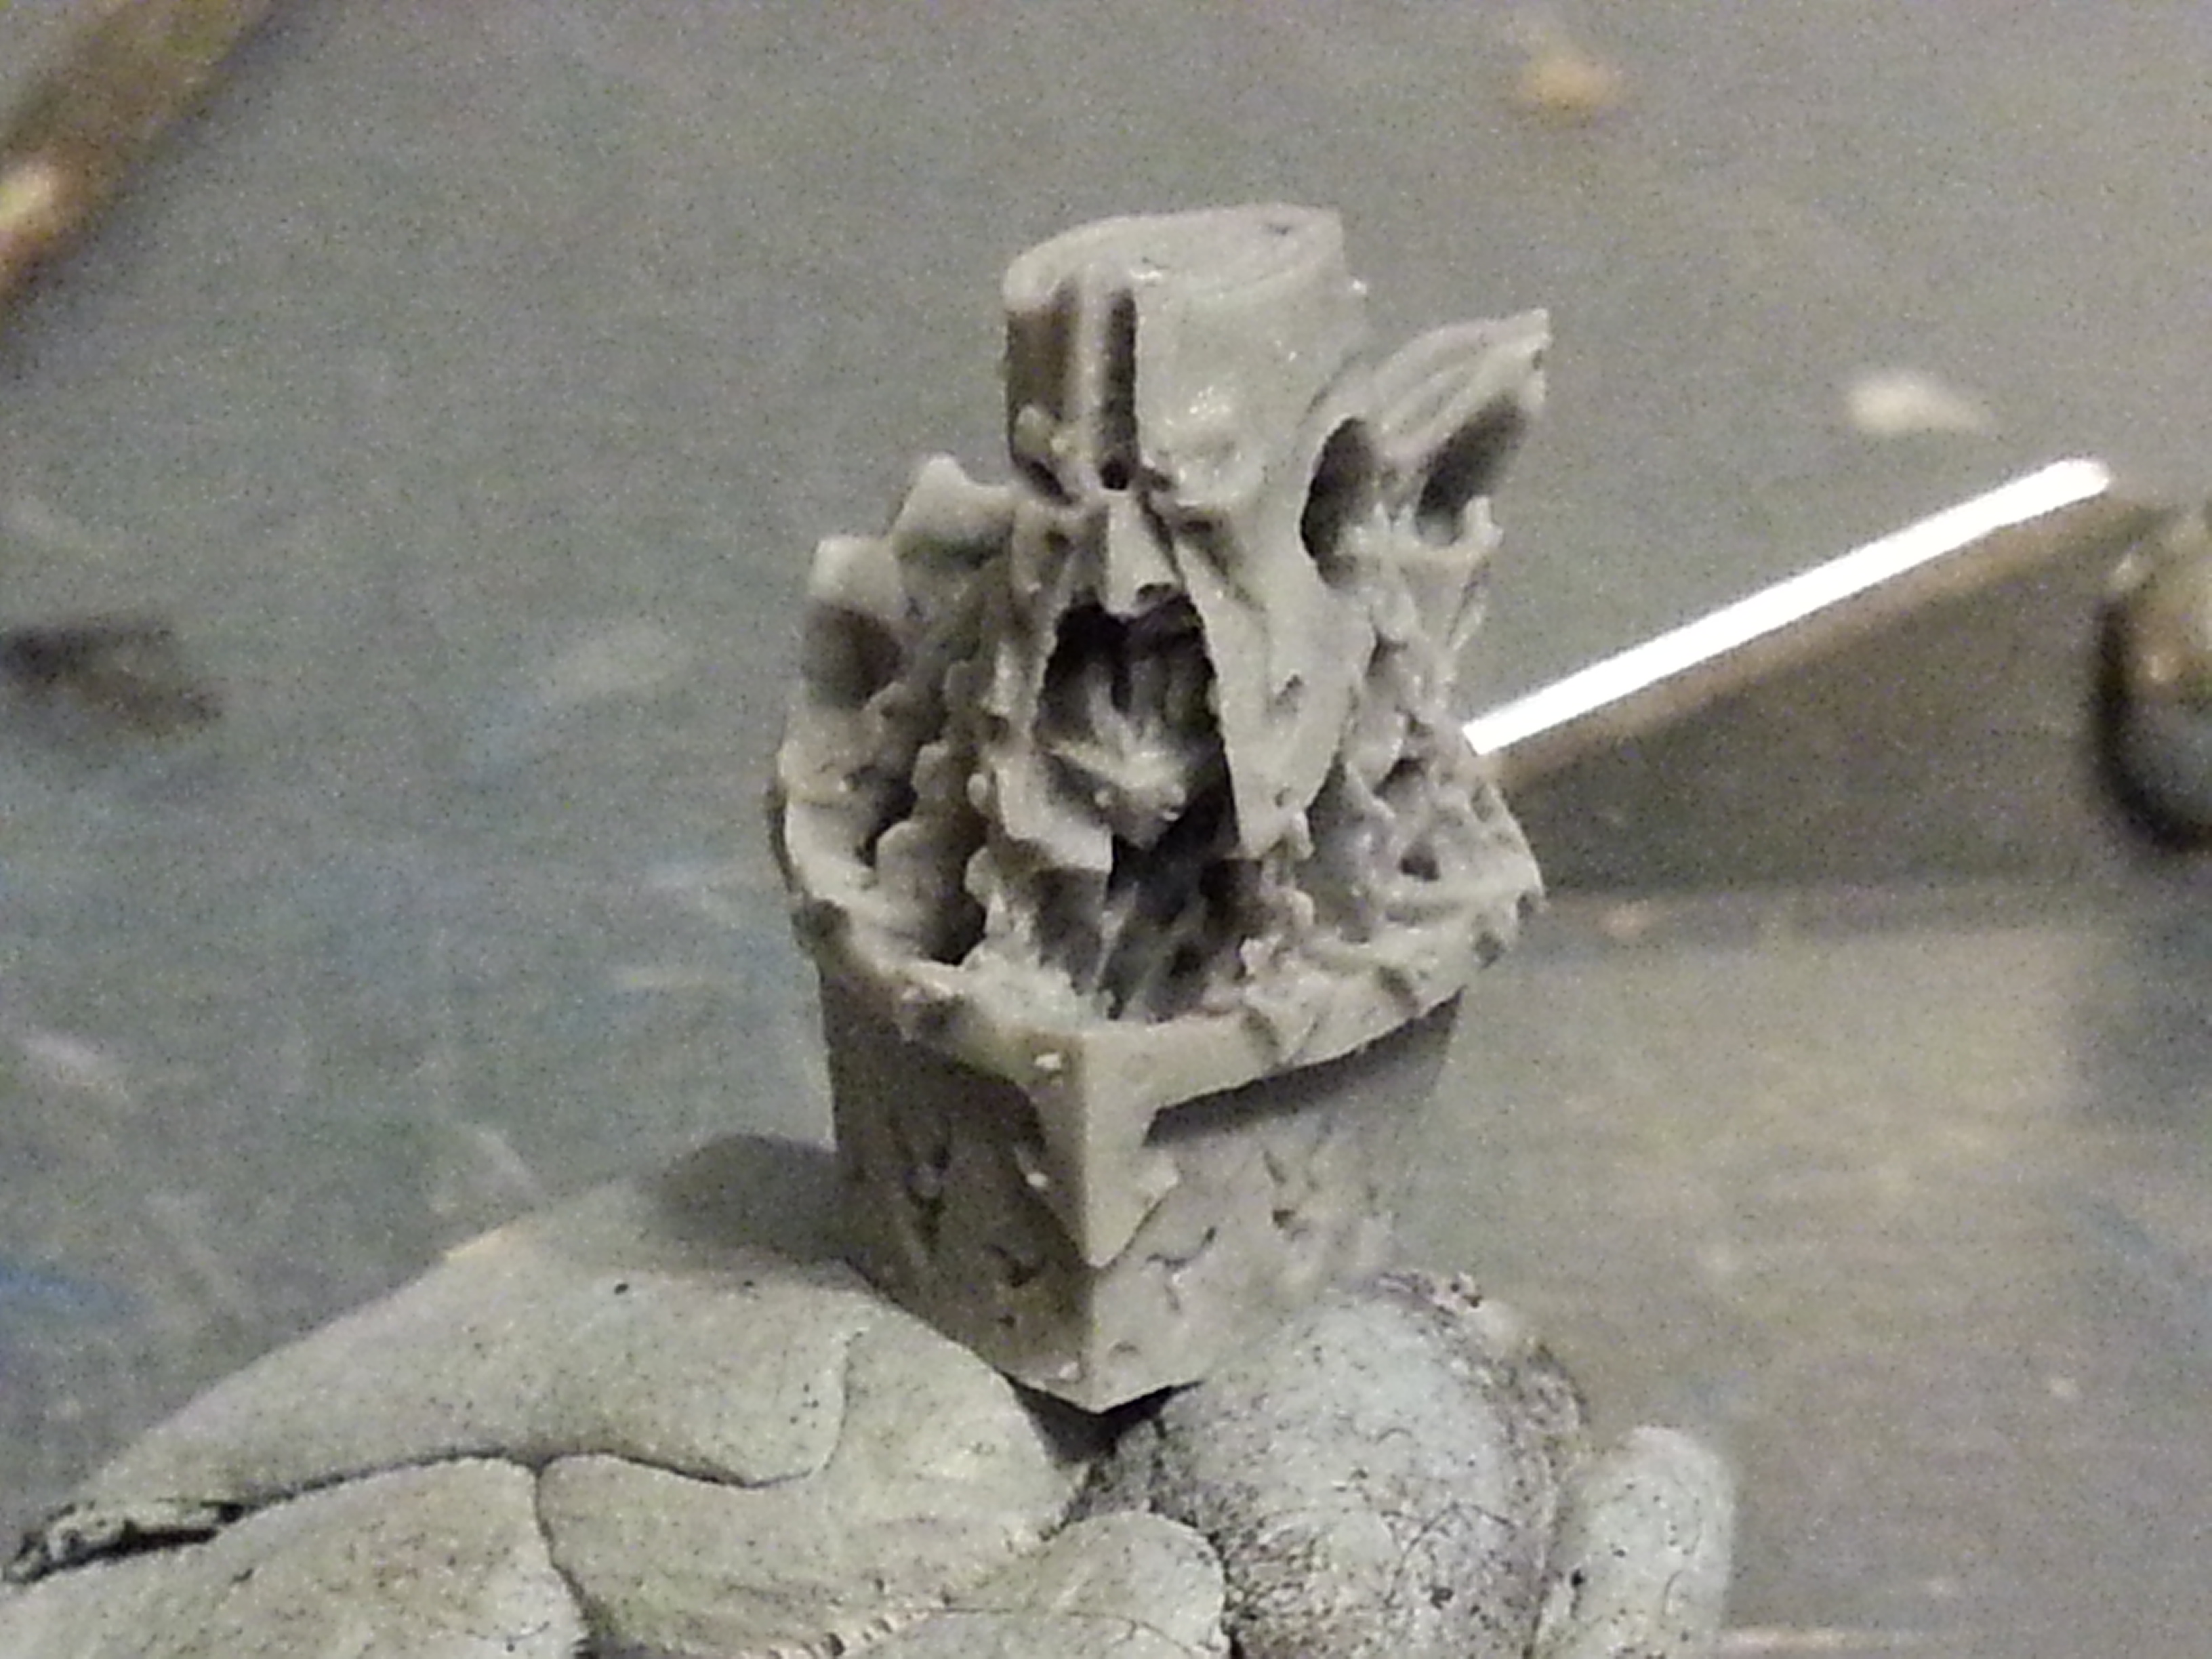
 I then used a bit of green stuff to sculpt up the flames. Now I am not a good sculptor, but these where quite easy.

Next up the arms,
I cut the Arms off just above the Greaves, taking care not to damage the delicate shoulder pad. Sadly, I managed to damage the shoulder spikes. I trimmed them down and shaped them to be less ‘chaosy’
Now again I attached these and it looked ok, but not a monster, I rummaged around for some blades, I noticed that under the Gauss Blaster was a small cutting blade. As I had 10 of these, I had plenty to play with. To give it gaming strength I needed to pin these. This was a mammoth task. Drilling in to these was very hard and I ended up damaging 4, but I still managed it to pull it together in the end.
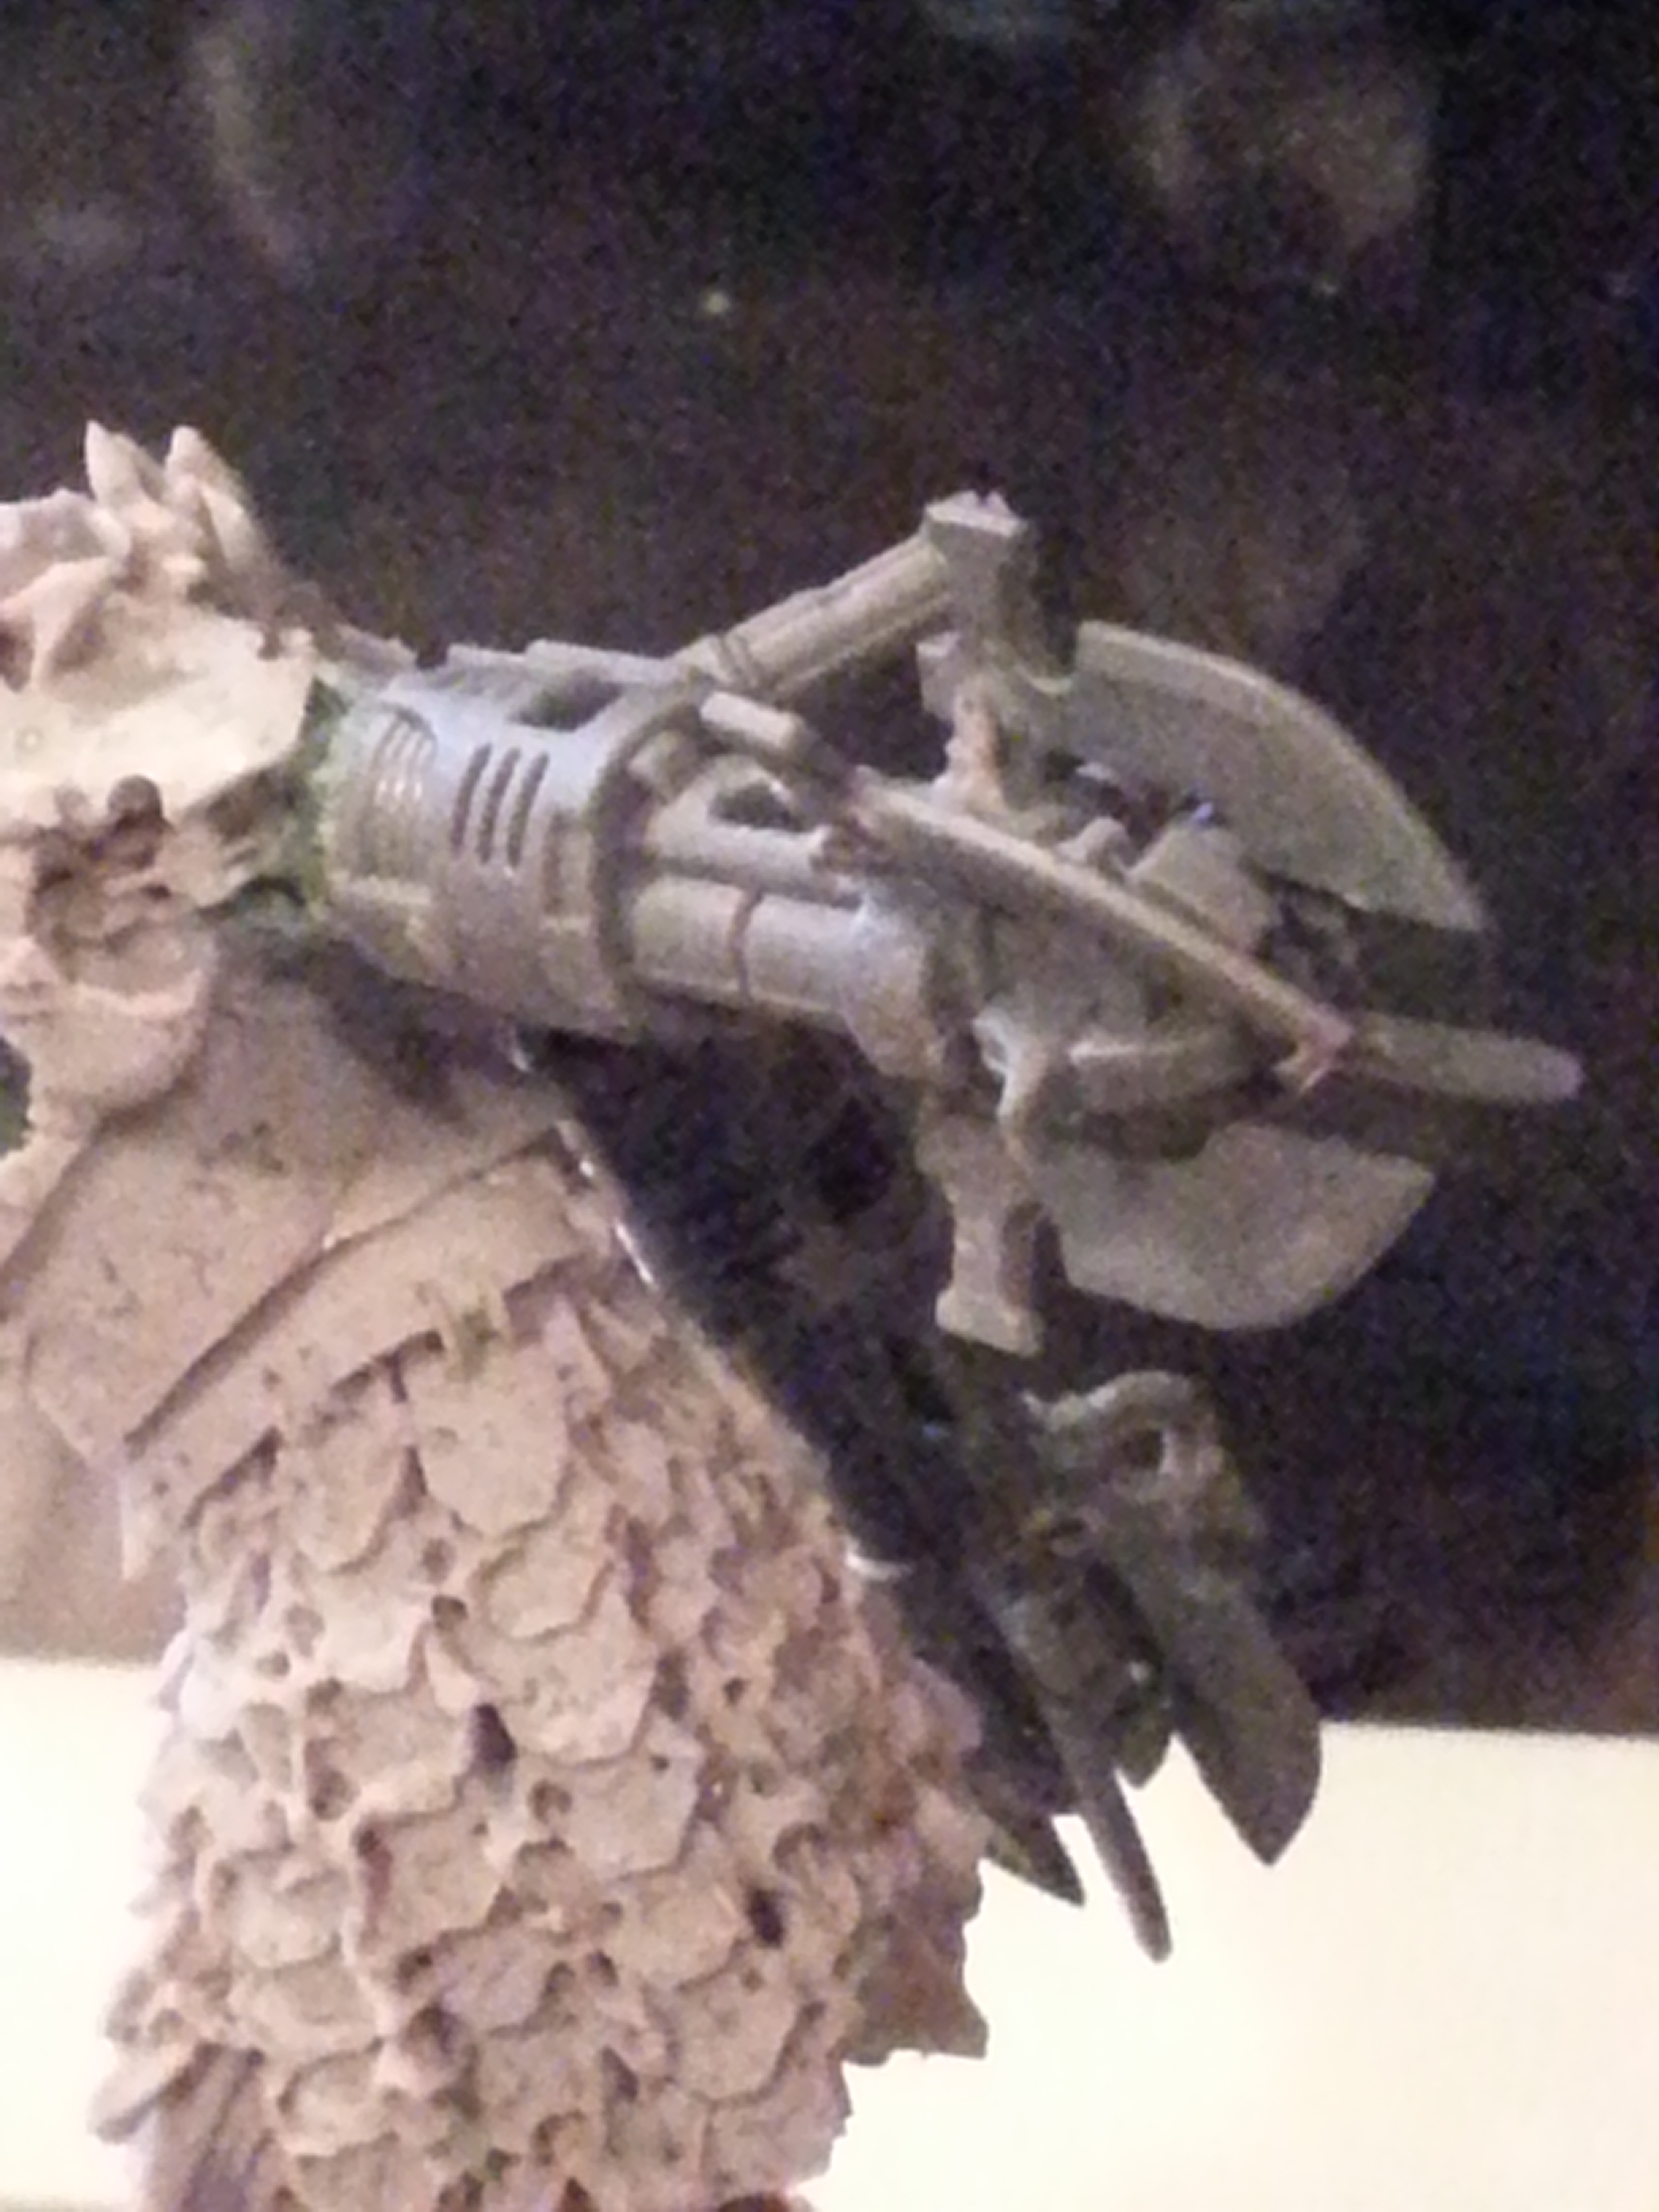
With 4 blades on each ‘hand’ I finally had the Look I wanted!

Painting Wise, I wanted to go with my regular Green and bone, with Bronze accents, I soon end up with more brass and I think the overall look was great.
So thats my Necron Shard. I have 2 more to paint and tomorrow I will be trying in battle. i will do a Blog on the battle and i will let you know how it gets on.
Till then see you across the Battle table.
